Split Testing With Cohorts.js To Convert More Traffic Into Leads
By setting up some simple tests and looking at the results you could be getting more leads, downloads and signups on your site. It’s as easy as comparing A against B and reporting the results. If you run meaningful tests you’ll get meaningful results.
Once your armed with that data you can use it to optimize your conversions and secure those leads that your currently missing out on.
Including a system that can run tests and allow you to make use of the data from the test is a 3 step process.
Step 1 – Include the testing library in your site.
Step 2 – Define your variants and serve them to users.
Step 3 – Look at the reports to see which variant works best.
So What Is Split Testing?
 Split testing is the process of comparing one variant against another and collecting the results. The aim is that after running a number of tests you can get a clear-cut answer to a ‘Which is better? A or B?’ kind of question.
Sometimes it’s called A/B testing or MVTs. They all mean the same thing but A/B testing uses only 2 variants. MVT, or Multi-Variant Tests, can be 2 or more.
Online that generally means that your testing 1 version of a page against another. The differences could range from a tiny change to a link text all the way up to huge layout & content changes.
What An Online Split Testing System Needs To Do
I’ve ran split tests with a number of different methods. I’ve done it with both server-side and client-side techniques and used different tools, companies and services. Thinking about how how they all worked work I was able to generalize what a testing system has to do into 4 major components.
You need to handle all of these in order for you to conduct a successful test and get clean data at the end.
- A way to define tests and it’s variants.
- A method to segment users and serve variants.
- A plan to ensure consistency between visits.
- A place to store results and produce reports.
The first 3 requirements we’re going to handle with an excellent JavaScript library called Cohorts. It was written by James Yu and published on github back in 2010.
To satisfy the final requirement we’ll pass off our data to an existing analytics package so that we can easily generate reports.
Storing & Reporting Your Split Test Results
The best place to store results of your split tests is along with the rest of your site analytics. That way you can cross-reference it in the reports to get a much better picture of what’s going on.
Most site owners have an analytics account of some kind. If you don’t already have one go and create one right now – you should be tracking your site visitors.
Google Analytics is by far the most popular platform but there are some other great alternatives to try – such as Piwik. Make sure your analytics provide uses an asynchronous tracking snippet and gives you access to a JavaScript API for tracking visitors to your site.
Google Analytics and Piwik both have the JavaScript API that you need. You should include your tracking snippet in the head of your page. There’s a number of different ways to do this, some themes have options panels you can add it too. There’s also have some great WordPress plugins to include the tracking snippets.
Adding The Split Testing Library To Your Site
To serve up our tests we’ll be using a JavaScript A/B testing library called Cohorts. The cohorts.js file does everything that good split testing system needs to including a way of passing the data off to a tracking server.
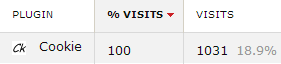 Cohorts also handles consistency between pages and visits by keeping users in a test group once it’s been assigned. It does this with Cookies. 100% of the visitor I tracked on this site last week accepted Cookies.
There’s 2 parts to Cohorts. The cohorts.js file, which is the testing library, and a custom script that defines tests and variants.
Including Cohorts.js In Your Page
Getting Cohorts into your site is just as easy as getting any other script in there. Upload the file to your site and link it from the header with a line like this.
<script type=”text/javascript” src=”https://www.pattonwebz.com/js/cohorts.js”></script>
WordPress users should upload it into their theme (or plugin) and enqueue it with the rest of the scripts.
Defining a Test & Variants To Compare
There’s a counterpart to cohrts.js – a custom script to define tests. Your going to need to write your own custom script but I’ll be giving plenty of examples to make that easy.
The custom script is written in JavaScript as well and follows an easy to understand syntax. It’s easy to understand while allowing you to have have total flexibility over the tests.
Here’s an example of the code used to create a test and it’s variants. I’ve commented throughout so you can understand what each section does.
<script>
$(document).ready(function() {
// Creates the test object
var a_test = new Cohorts.Test({
name: 'a_test', // Sets the global test name
scope: 1, // Sets the scope for the test. 1: Visitor, 2: Session, 3: Page
cv_slot: 5, // Sets the custom variable slot used - not used in this test but useful for more advanced tracking
sample: 1, // Sets the total amount of people included in the test 1=100%, 0.3=30% etc.
cohorts: {
// The next line sets the name of the variant
variation_a: {
onChosen: function() {
// Following line makes the change for this variant
// Using jQuery target an element and edits the html it contains
// This could target any .class, #id or element you wanted
// It could make any edits you wanted like CSS changes or content changes
$('#signup-button').html('Sign Up!');
// Additional lines of code could be added here if multiple edits were required
}
},
variation_b: {
onChosen: function() {
// Following line makes the change for this variant
$('#signup-button').html('Get Access!');
}
},
},
});
// This function triggers when the target element is clicked to track conversions
$('#signup-button').click(function() {
// Track any events with your storage adapter
a_test.event('Clicked on Button'); // You can send any message you like
});
// Add more test objects as you need by setting var test = new Cohorts.Test()
});
</script>
In the sample above jQuery is used to add the function to the document.ready() function so it gets executed when the page is ready. jQuery is used again to make the edits to the page and track any clicks.
Not all sites have jQuery included. If you don’t you can convert the code to work without it by adding it directly to document.ready() yourself and using pure JavaScript for variants.
Rundown of What’s Happening in the Test Code
What’s going on there is that a test is being created called a_test. That test is being given 2 variants: variation_a and variation_b. Whenever one of the variants is chosen for the user the code is executed that edits an element – targeted with an ID of #signup-button.
It sends signals back to the tracking server at 2 different times. The first signal sends when the test is run. The second is sent when the element is clicked (a conversion). You need to track both those metrics so you can calculate statistical significance.
Tracking The Results of Your Tests & Reporting
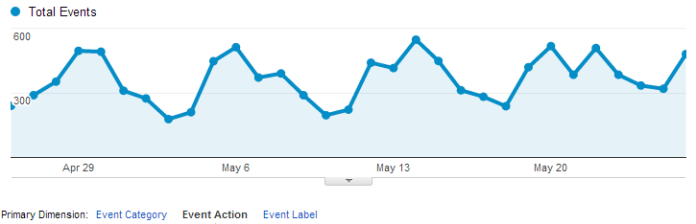
Tracking events with GA is extremely easy, especially if the tracking snippet is already included in your page. All you need to do is push some data into a variable and it’ll be sent to the tracking server.
I previously mentioned you could also do this with Piwik, as well as GA. The reason I mentioned it is because of how strikingly similar the tracking code is between them. Here’s some example code to show you what I mean.
if (cv_slot) _gaq.push(['_setCustomVar', cv_slot, action, opt_label, scope]); // GA with a custom variable
if (cv_slot) _paq.push(['setCustomVariable', cv_slot , action ,opt_label]); // Piwik with a custom variable
_gaq.push(['_trackEvent', category, action, opt_label, opt_value, int_hit]); // GA with an event
_paq.push(['trackEvent', category , action ,opt_label, opt_value]); // Piwik with an event
Adding the tracking code to Cohorts is done via a storage adapter. There’s a default storage adapter built in but I never had any luck making it work. The simple solution is to define one of your own.
Here’s the sample code from above this – time with a storage adapter included.
<script>
$(document).ready(function() {
var a_test = new Cohorts.Test({
name: 'a_test',
scope: 1,
cv_slot: 5,
sample: 1,
cohorts: {
variation_a: {
onChosen: function() {
$('#signup-button').html('Sign Up!');
}
},
variation_b: {
onChosen: function() {
$('#signup-button').html('Get Access!');
}
},
},
storageAdapter: {
 nameSpace: 'cohorts',
 // The TrackEvent method is not run directly, it's triggered by onInitialize and onEvent
 // onEvent appends some info to the label so that it can be distinguished as a conversion
 trackEvent: function(category, action, opt_label, opt_value, int_hit, cv_slot, scope) {
 _gaq.push(['_trackEvent', category, action, opt_label, opt_value, int_hit]);
 },
// onInitialize runs every time a test does
// It tracks total users each variant was served to
 onInitialize: function(inTest, testName, cohort, cv_slot, scope) {
 if(inTest && scope !== 3) {
 this.trackEvent(this.nameSpace, testName, cohort, 0, true, cv_slot, scope);
 }
 },
// onEvent runs when a conversion occurs
 onEvent: function(testName, cohort, eventName) {
 this.trackEvent(this.nameSpace, testName, cohort + ' | ' + eventName, 0, false);
 }
});
$('#signup-button').click(function() {
a_test.event('Clicked on Button'); // Track any events with your storage adapter
});
// Add more test objects as you need
});
</script>
Linking It All Together
Now that you’ve seen how the default code works it’s time to decide what you want to test and start running some of your own. If your new to the concept of split testing or haven’t decided what you should test then I recommend you skip a section and have a look at the examples first.
If you included the cohorts.js library above and have tracking code installed then the last thing you need to do is write your own custom test script.
The example code above assumes that you wanted to test on an element with an ID of #signup-button and you wanted to edit the text. That’s probably not the case for you.
Variables for the custom script
There’s a few different variables that you need to provide in the test. The element your targeting & the variants you want to compare. You also need to give a name to the test and one to each variant. Finally you need to decide what message to pass to indicate a conversion.
The element your targeting
You can target any element on your page that can be targeted with JavaScript. That means you can target practically anything.
If your targeting a single element on your site then it’s probably best to target it with an #ID. Other times you might be targeting a whole group of items and in that case you can target things with a .class.
<a href="'/signup/" id="signup-button" class="btn btn-large">Sign Up!</a>
You can target that link using either of these 2 lines of jQuery. The second one would also apply to any other items on the page with the .btn class.
$('#signup-button').html('Get Access!');
$('.btn').html('Get Access!');
The edit your making
There are a number of different edits you might want to make. Using the .html() method allows you to edit the content of the element but what if you wanted to change something else?
You can manipulate the CSS styles to adjust how something looks with the .css() method.
$('#signup-button').css('background-color', '#ddd');
You can edit any css property you want like that so changing colors or sizes is a breeze.
Naming your tests
Your tests and variants can be called anything you want. You should use something meaningful so you can easily identify them in the reports.
At the very least you’ll need a global name for your test and 2 more for each variant.
Passing a conversion message
This message is passed whenever a test converts and it can be whatever text you want. I pass a message that tells me the action (usually a click) and what it’s been done to (like a button or link). Bear in mind that there’s a message limit so keep it short and descriptive.
5 Questions A Split Test Can Answer & Give Meaningful Results
Getting the most from a test is going to vary depending on a site’s goals. A trial signup might be worth more than a download but an email signup might be worth more than both. That’s why it’s worthwhile having a system that’s flexible.
Here’s an example of some meaningful tests that might be performed on a website to improve conversions and you can run every one of them with Cohorts.
- Does the default signup button generate more clicks if it’s a different color?
- How will tweaking the text on a product page affect the shoppers decision to buy?
- Which testimonial on my homepage do people connect with the most?
- Does moving my pricing farther down the page scare away less buyers when they see it?
- If other features of a service were highlighted would it get more positive attention?
Some of those changes are simple, like changing a button, but others are more complicated. When you think about tweaking a sales page or moving a collection of elements around that’s going to require more than a single line of jQuery code.
You can add as many lines of JavaScript or jQuery as you want for each test meaning you can make multiple edits or run the test on an entire sales funnel if you wanted with some simple code.
If you have any questions or need help writing the jQuery to perform the edits let me know.